
Cartridge Dust Collector Dust Emission Exceeding Standards: A Step-by-Step Troubleshooting Analysis
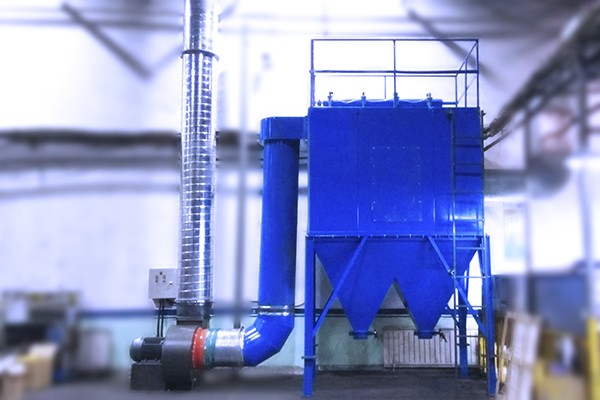
When a cartridge dust collector begins discharging visible dust from the clean air outlet, the problem rarely resolves itself. Emission exceedances trigger regulatory scrutiny, waste energy, and signal an underlying failure that will only worsen if ignored. The challenge lies in the fact that dust bypasses the filter through multiple pathways—some obvious, others hidden deep within the collector's internal geometry. A methodical, priority-based inspection sequence is the most reliable way to isolate the root cause without replacing components indiscriminately.
Start With the Simplest Suspect: Seals and Gaskets
Before opening the filter housing, verify that every access point is secure. Damaged or improperly seated gaskets on the tube sheet, filter access covers, and hopper discharge flanges allow dust-laden air to shortcut the filtration media entirely. This is especially common after recent filter replacements, when a gasket may have been pinched, omitted, or installed in the wrong orientation.
Check the following in order:
Tube sheet gaskets: confirm each cartridge seats flush and compresses the gasket evenly.
Access door seals: look for tears, compression set, or hardening from heat exposure.
Aftermarket filter compatibility: verify that replacement cartridges match the original dimensional specifications, particularly the gasket diameter and pleat pack height.
If visual inspection is inconclusive, a fluorescent trace powder test remains the definitive method. Introduce a fine fluorescent powder into the dirty-air plenum, operate the collector briefly, then inspect the clean-air side with a black light. Any glow indicates the precise leak path.
Inspect the Filter Media for Damage and Misapplication
A single compromised cartridge can produce visible emissions even when every other component performs correctly. Media damage takes several forms: abrasion from high-inlet-velocity dust, chemical degradation in corrosive gas streams, thermal damage from unexpected temperature spikes, or mechanical tears introduced during installation.
Remove a sample cartridge and examine both the dirty and clean sides. Dust present on the clean-air side of the pleats confirms that particles have penetrated the media. Look specifically for:
Pinholes or tears along the pleat folds
Separation at the end caps or seam
Crushing or deformation of the pleat structure
Equally important is verifying that the media specification matches the actual dust characteristics. Hygroscopic, oily, or sticky dusts require hydrophobic or PTFE-membrane media to release the dust cake effectively during cleaning. Submicron particulate may demand nanofiber media to achieve the required filtration efficiency. If the process has changed—new materials, altered moisture content, or different particle size distribution—the original filter specification may no longer be adequate.
Evaluate the Pulse-Jet Cleaning System's Actual Performance
An over-cleaning or under-cleaning pulse system produces opposite symptoms but both can lead to emission problems. Over-cleaning strips the protective dust cake from the media, allowing fine particles to migrate deeper into the pleats and eventually pass through. Under-cleaning leaves excessive dust accumulation, raising pressure drop and forcing air to find paths of least resistance—often through compromised seals or media.
Listen to the pulse sequence during operation. A sharp, distinct report indicates adequate compressed air energy. A weak hiss or silence points to insufficient pressure, a failed solenoid, or a stuck diaphragm valve. Verify that the compressed air supply is dry and at the pressure specified by the equipment manufacturer—typically in the range of 0.5 to 0.7 MPa for cartridge systems.
Check the cleaning controller settings against the actual pressure drop behavior. If the system pulses continuously but pressure drop does not recover, the problem is not the cleaning frequency but the cleaning energy or the media condition itself.
Verify Airflow and System Balance
Excessive airflow through the collector can overwhelm the filter media's capacity to retain dust. This occurs when a damper has been opened beyond design limits, a fan has been upgraded without corresponding filter area adjustment, or the air-to-cloth ratio was marginal from the start and has been pushed beyond its limit by process changes.
A sudden drop in pressure drop across the collector—rather than the more familiar rise—can paradoxically indicate a filter breach or a massive seal failure, because air is bypassing the media entirely. Cross-reference differential pressure readings with the cleaning system's behavior to distinguish between a genuine airflow increase and a filtration bypass.
| Symptom | Likely Area | Immediate Check |
|---|---|---|
| Visible dust plume, steady pressure drop | Seal or gasket failure | Tube sheet and access door integrity |
| Visible dust, rising pressure drop | Media blinding or cleaning failure | Pulse pressure and cartridge condition |
| Intermittent dust, normal pressure drop | Cartridge installation error | Seating and alignment of each filter |
| Dust only after pulse cycle | Over-cleaning or media degradation | Cleaning intensity and filter age |
Confirm Proper Cartridge Installation
An incorrectly installed cartridge creates a gap between the filter and the tube sheet that is often invisible from the exterior. The cartridge may appear seated but fail to compress the gasket sufficiently, or the locking mechanism may not be fully engaged. This is particularly common with twist-lock and clamp-bar retention designs.
After installing any cartridge, attempt to rotate or lift it manually. A properly secured filter should not move. For clamp-bar systems, verify that the bar exerts even pressure across the entire cartridge top. For twist-lock designs, confirm that the locking tabs have fully engaged the tube sheet collar.
When the Obvious Checks Fail: Internal Wear and Structural Issues
If seals, media, cleaning system, and installation all pass inspection, the leak may originate from structural deterioration within the collector housing. Weld seams can crack under thermal cycling or vibration. The tube sheet itself may develop fatigue cracks or corrosion perforations. Inlet baffles that have eroded away no longer protect the filter media from direct dust impingement, accelerating localized wear.
A targeted inspection of the dirty-air plenum with a bright light, conducted while the system is offline, can reveal dust tracking patterns that point to the leak location. Dust streaks on the clean-air side of the tube sheet indicate the path that bypassed air has followed.
A Note on Professional-Grade Equipment and Support
Persistent emission problems that resist standard troubleshooting often trace back to equipment selection or system design limitations. Zhengzhou Puhua Technology manufactures cartridge dust collectors and related industrial air pollution control equipment engineered for stable performance across demanding operating conditions. The company's product range includes baghouse dust collectors, pulse-jet cartridge collectors, mobile dust collection units, and ultra-low emission systems, alongside desulfurization, denitrification, VOC treatment, and pneumatic conveying equipment. For facilities where emission compliance is non-negotiable, verifying that the collector's design parameters match the actual process conditions is a necessary first step before investing further in component-level repairs.
Final diagnostic sequence summary:
Inspect all seals and gaskets.
Examine filter media for damage and specification mismatch.
Test pulse-jet cleaning energy and compressed air quality.
Verify airflow and pressure drop trends.
Confirm correct cartridge installation.
Investigate internal structural integrity.
Resolving an emission exceedance requires patience and a systematic approach. Replacing filters without identifying the root cause wastes money and leaves the underlying vulnerability in place. Working through the sequence above in order will identify the majority of common failure modes before more invasive—and expensive—interventions become necessary.
Related Articles
-

Zeolite Fixed Bed+Catalytic Combustion Equipment (RCO)
7596
-

Resin desorption+condensation recovery equipment
5528
-

Cooking oil fume purifier
11561
Subscribe to Our Newsletter
Stay updated with the latest news and insights from Puhua Tech.